Convert Excel to Web
Download sample file and create the web report foundation
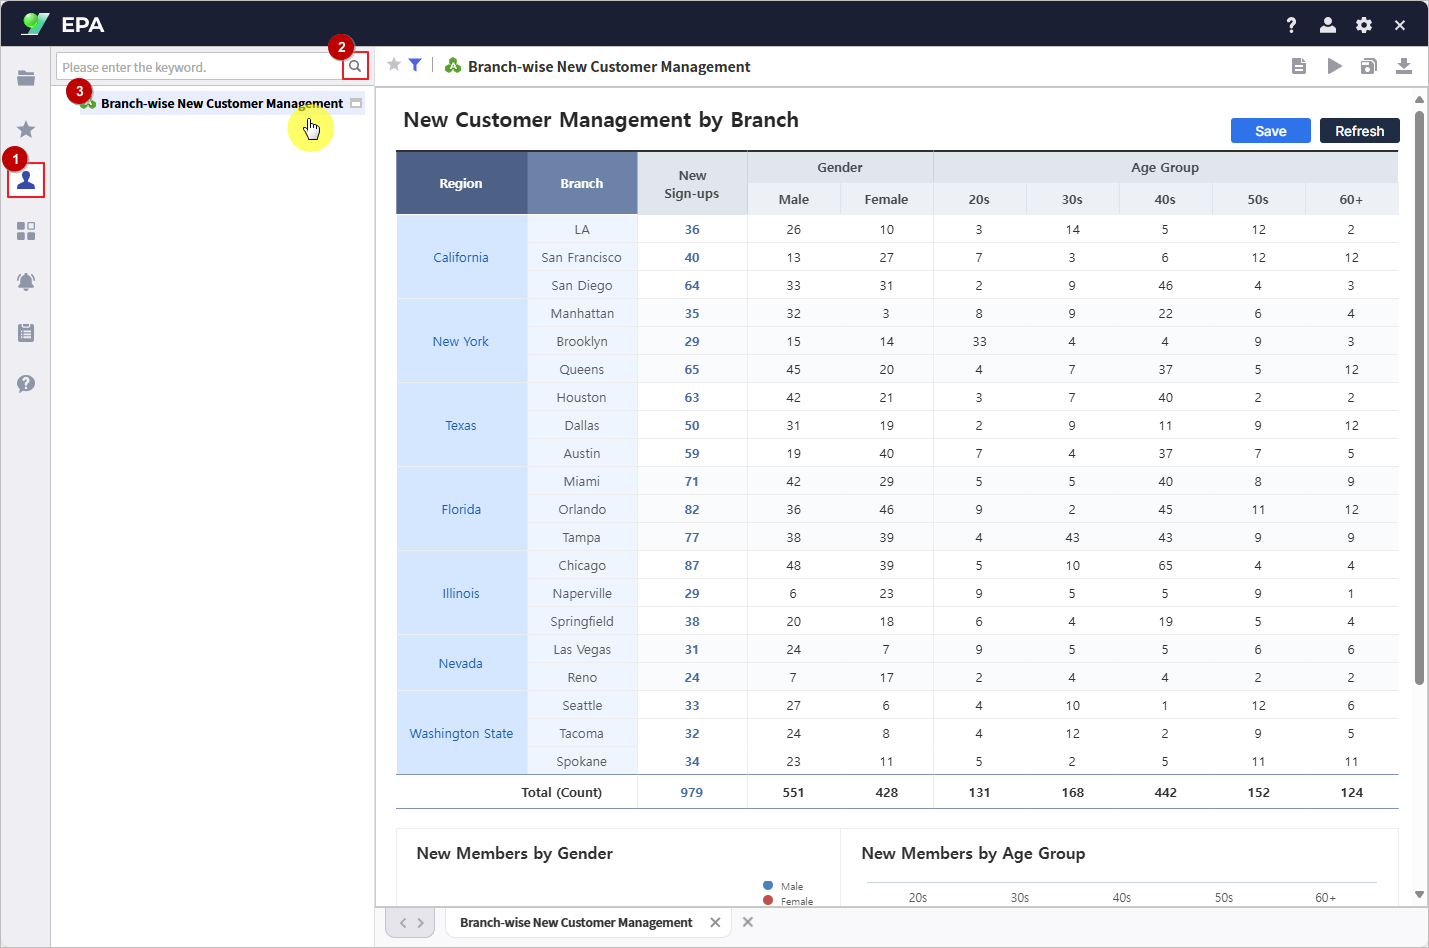
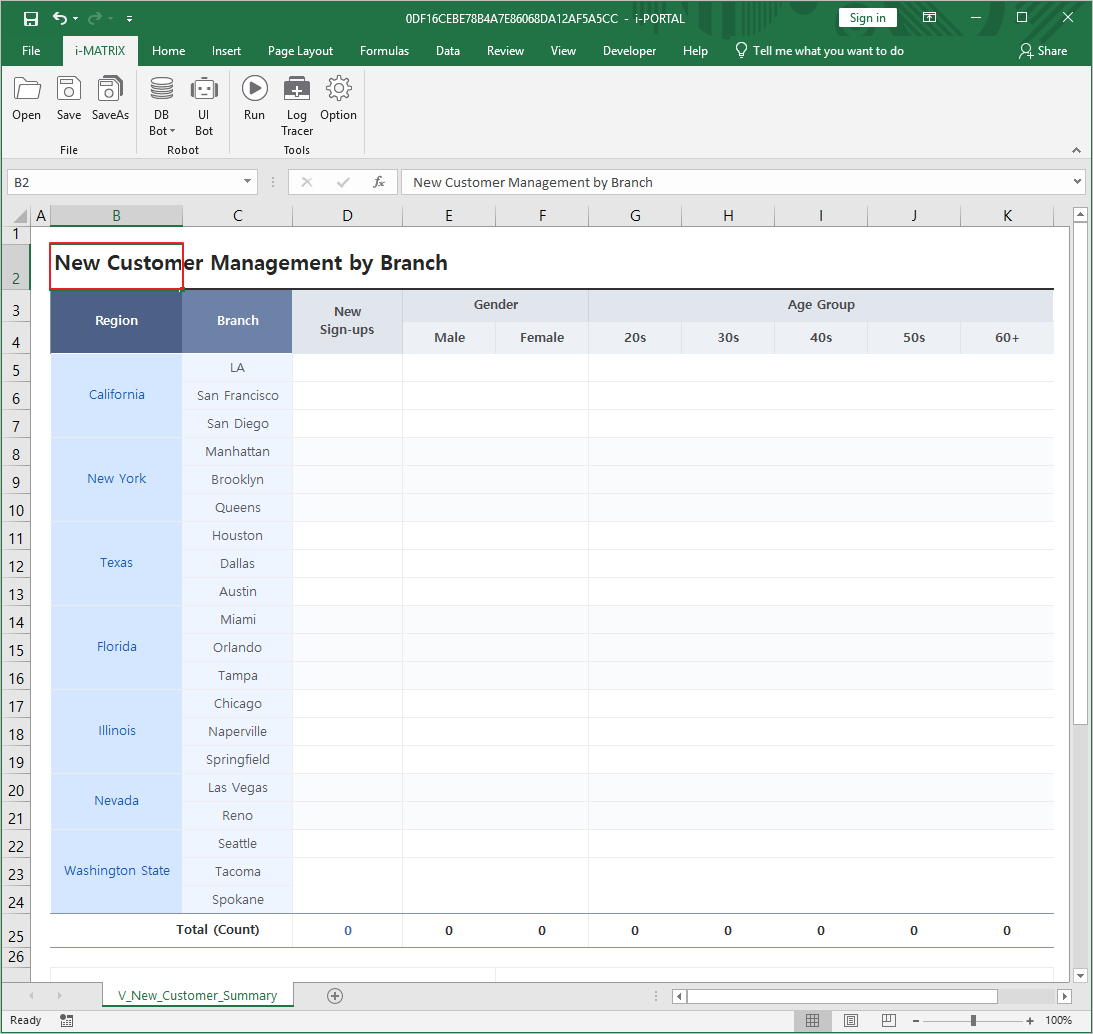
Download the sample Excel file for branch-wise customer management from Learning Experience Samples.
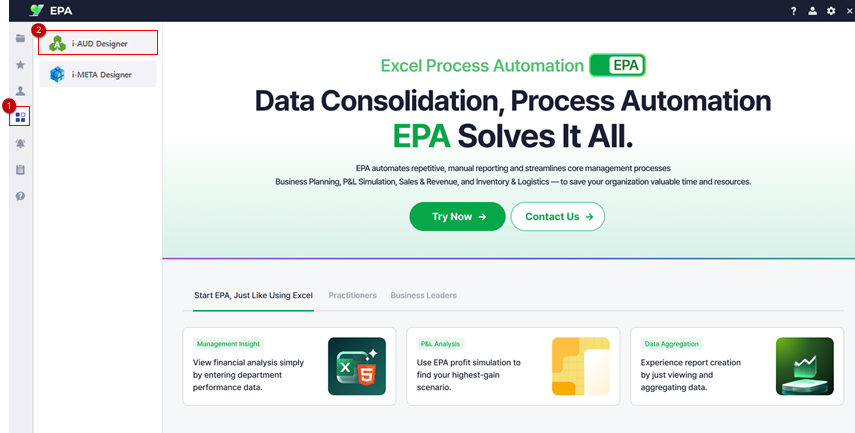
Launch i-AUD Designer from [Menu] → [Tool].
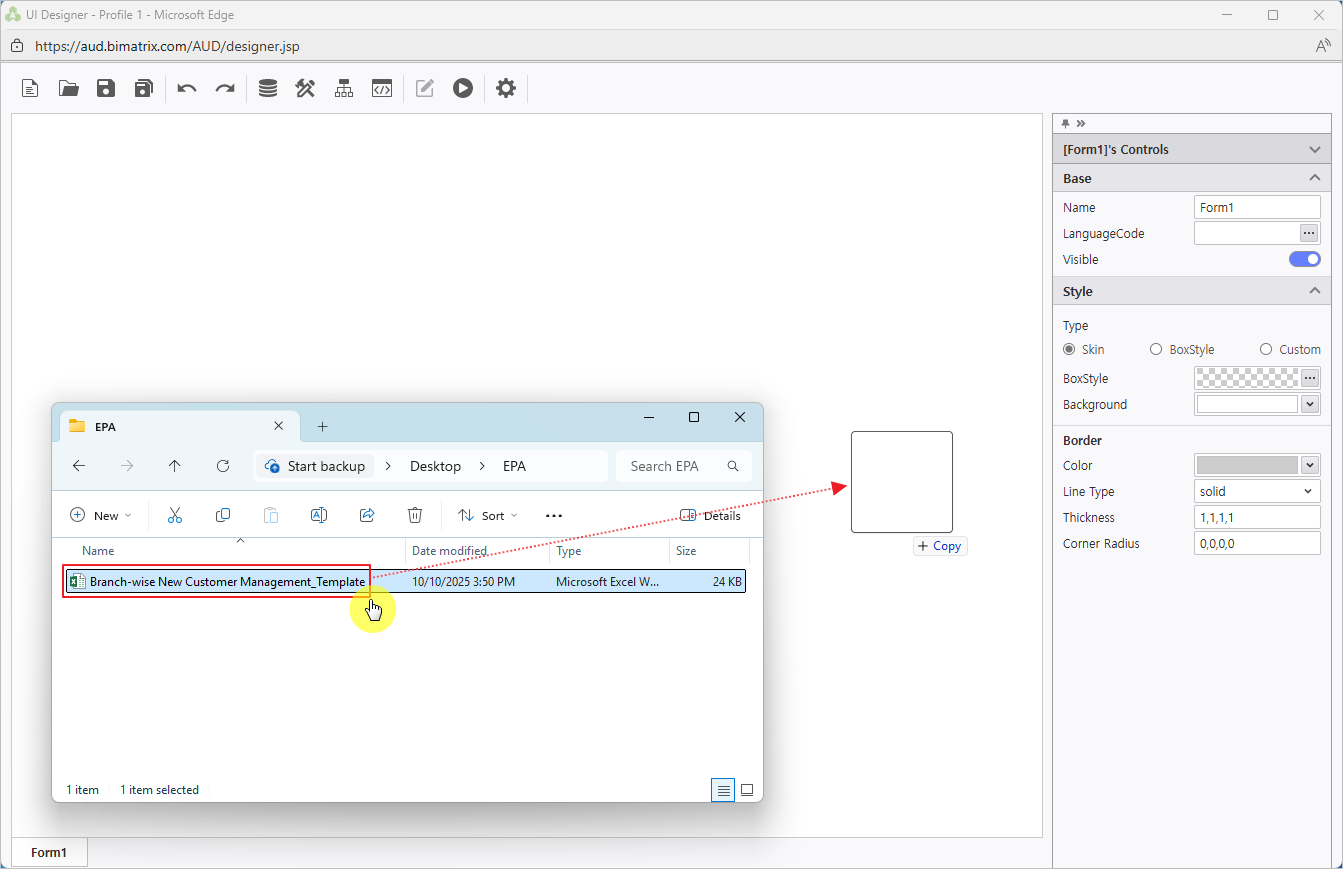
Drag & drop the Excel file into the Designer workspace.
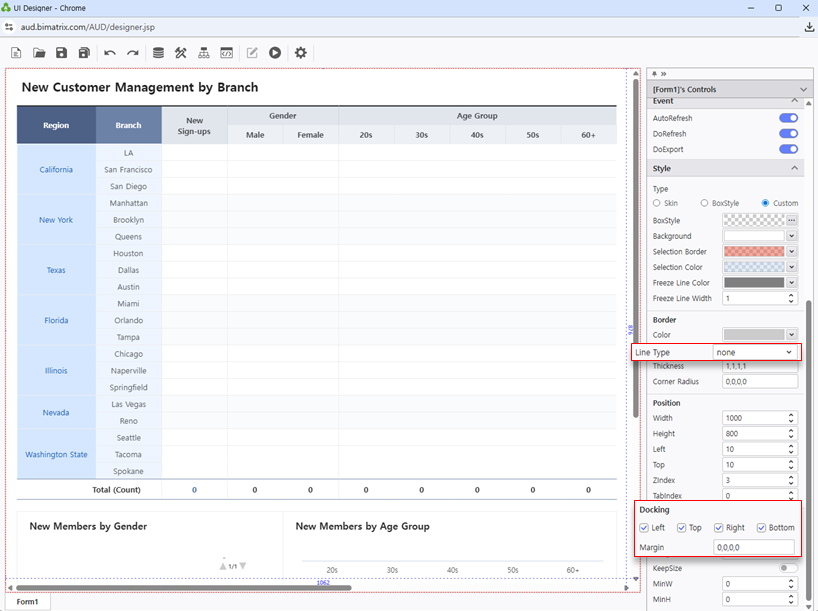
Configure Docking to Left / Top / Right / Bottom and set Line Type: None for a clean layout.
Tip: Using all four docking positions (Left/Top/Right/Bottom) ensures the report fills the entire viewport for optimal readability.
Configure Data Input
Define data areas, tables, and launch the UI configuration
In the top-left corner of the area defined as table1, enter the table name.
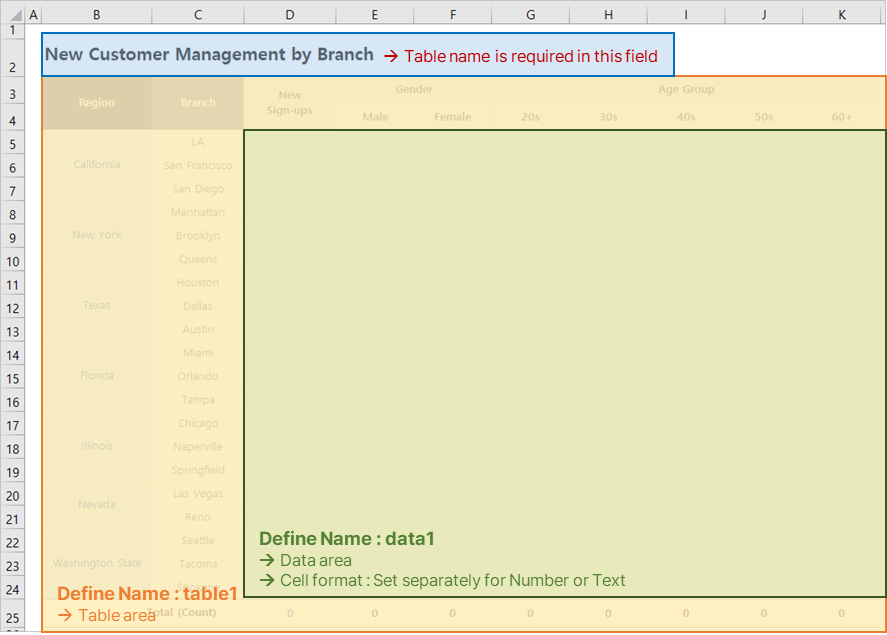
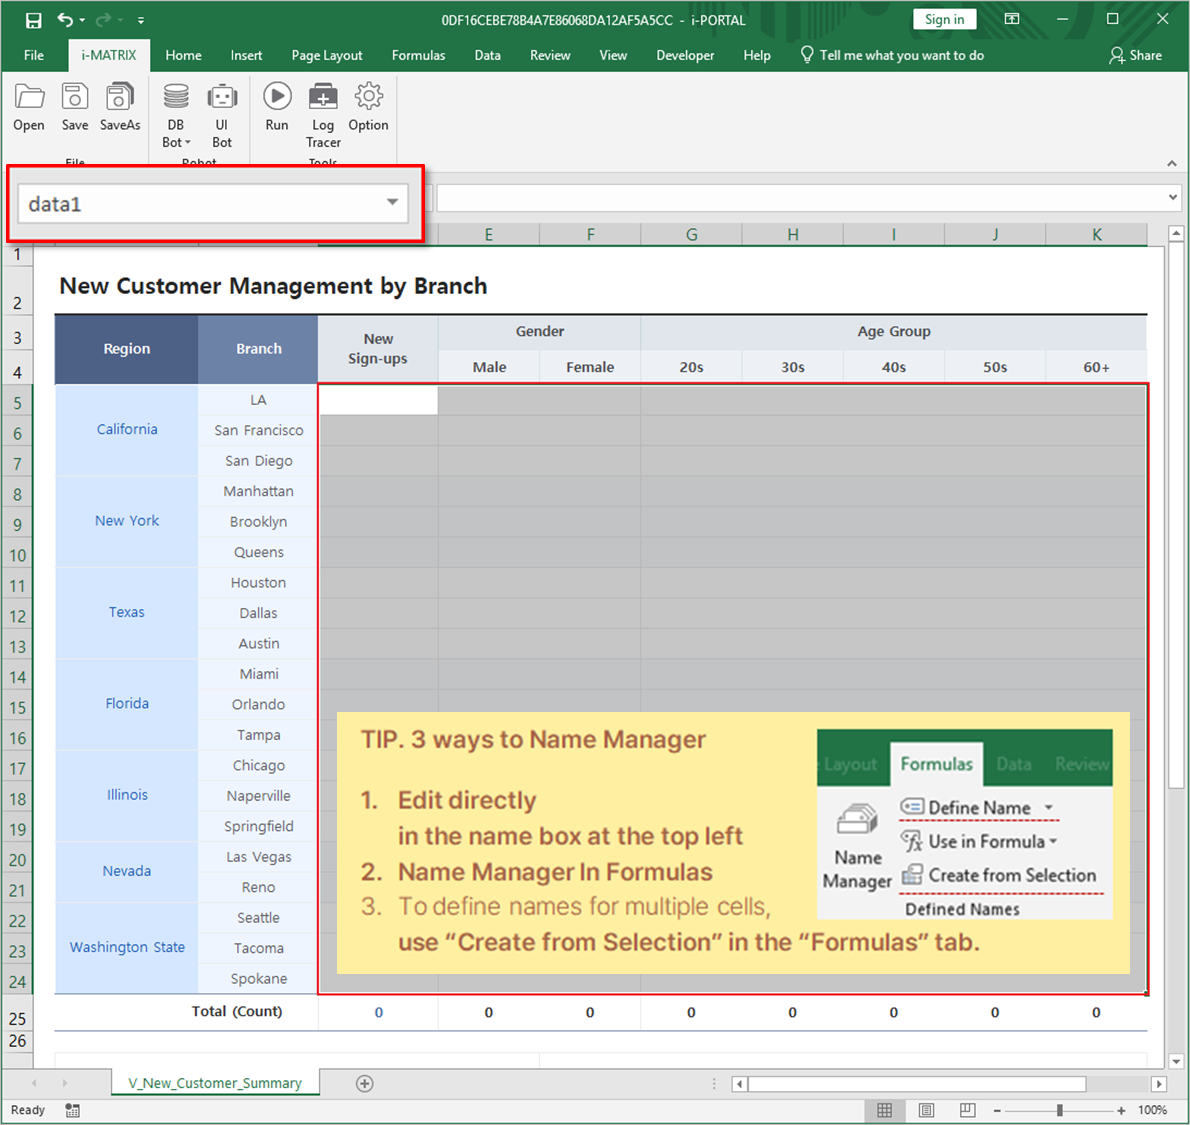
Select the area where data will be entered and name it data1.
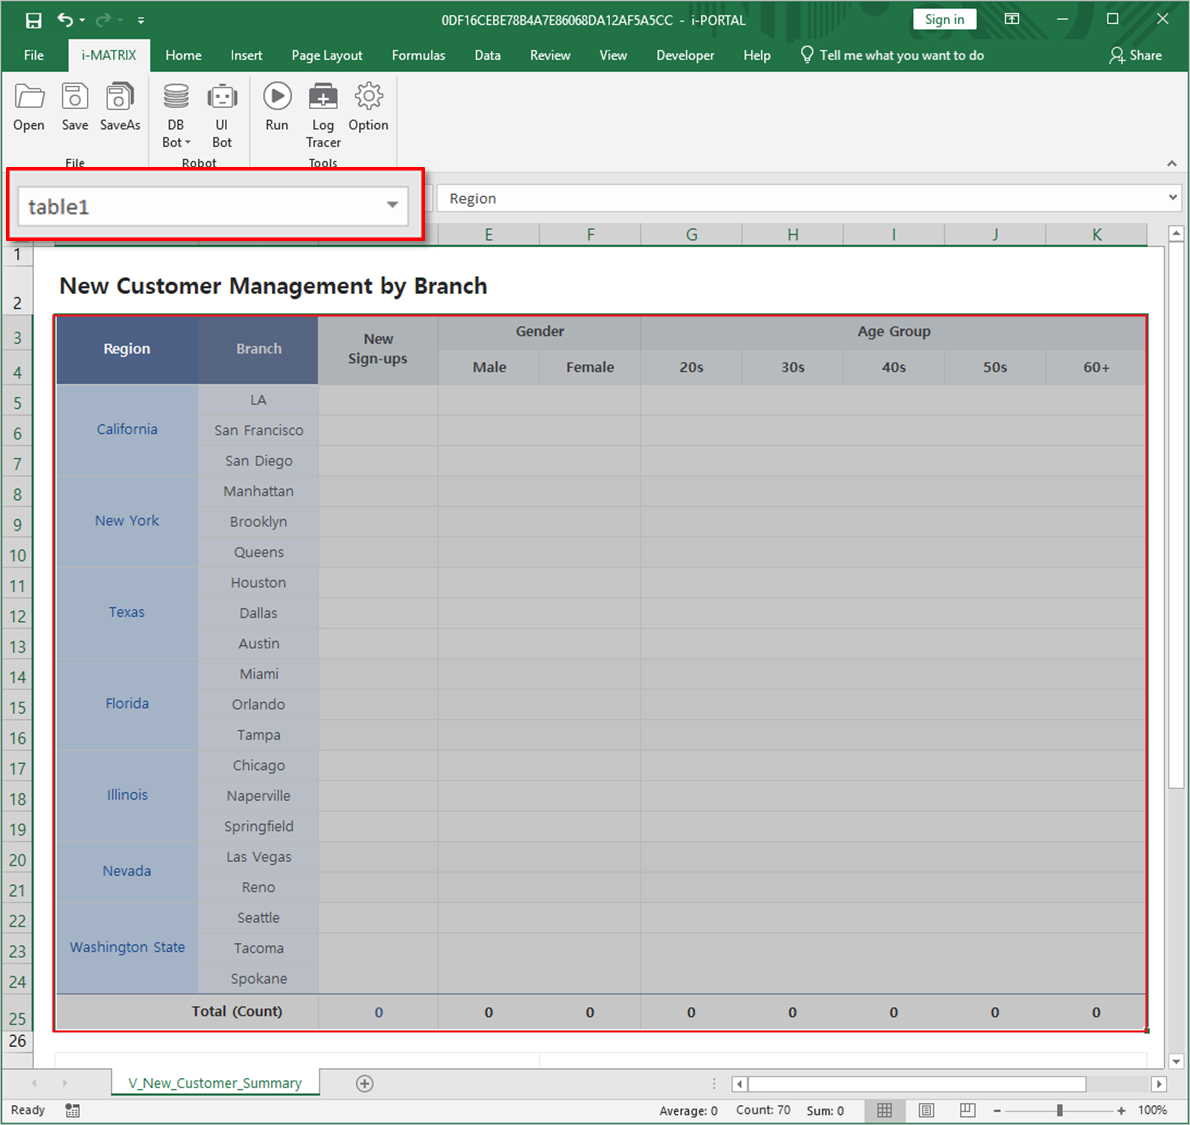
Select the entire table form to be aggregated and name it table1.
If you don't want the table name visible on the web, you can hide the row in Excel.
Tip: Hiding the row containing the table name keeps the web interface clean while maintaining the naming structure the system needs.
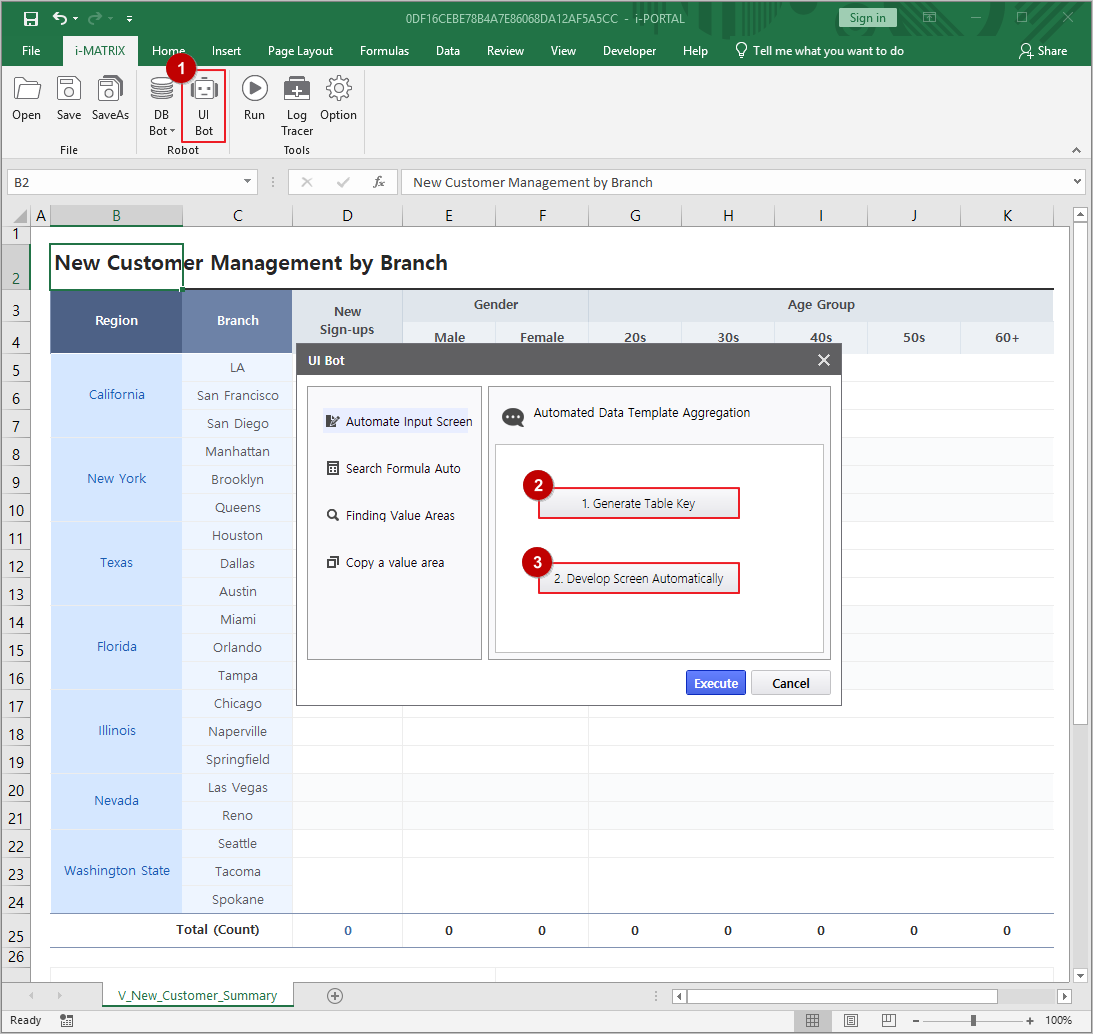
Launch UI Bot from the i-MATRIX ribbon to configure the input interface.
Connect Database & Buttons
Set up database upload, merge execution, and action buttons
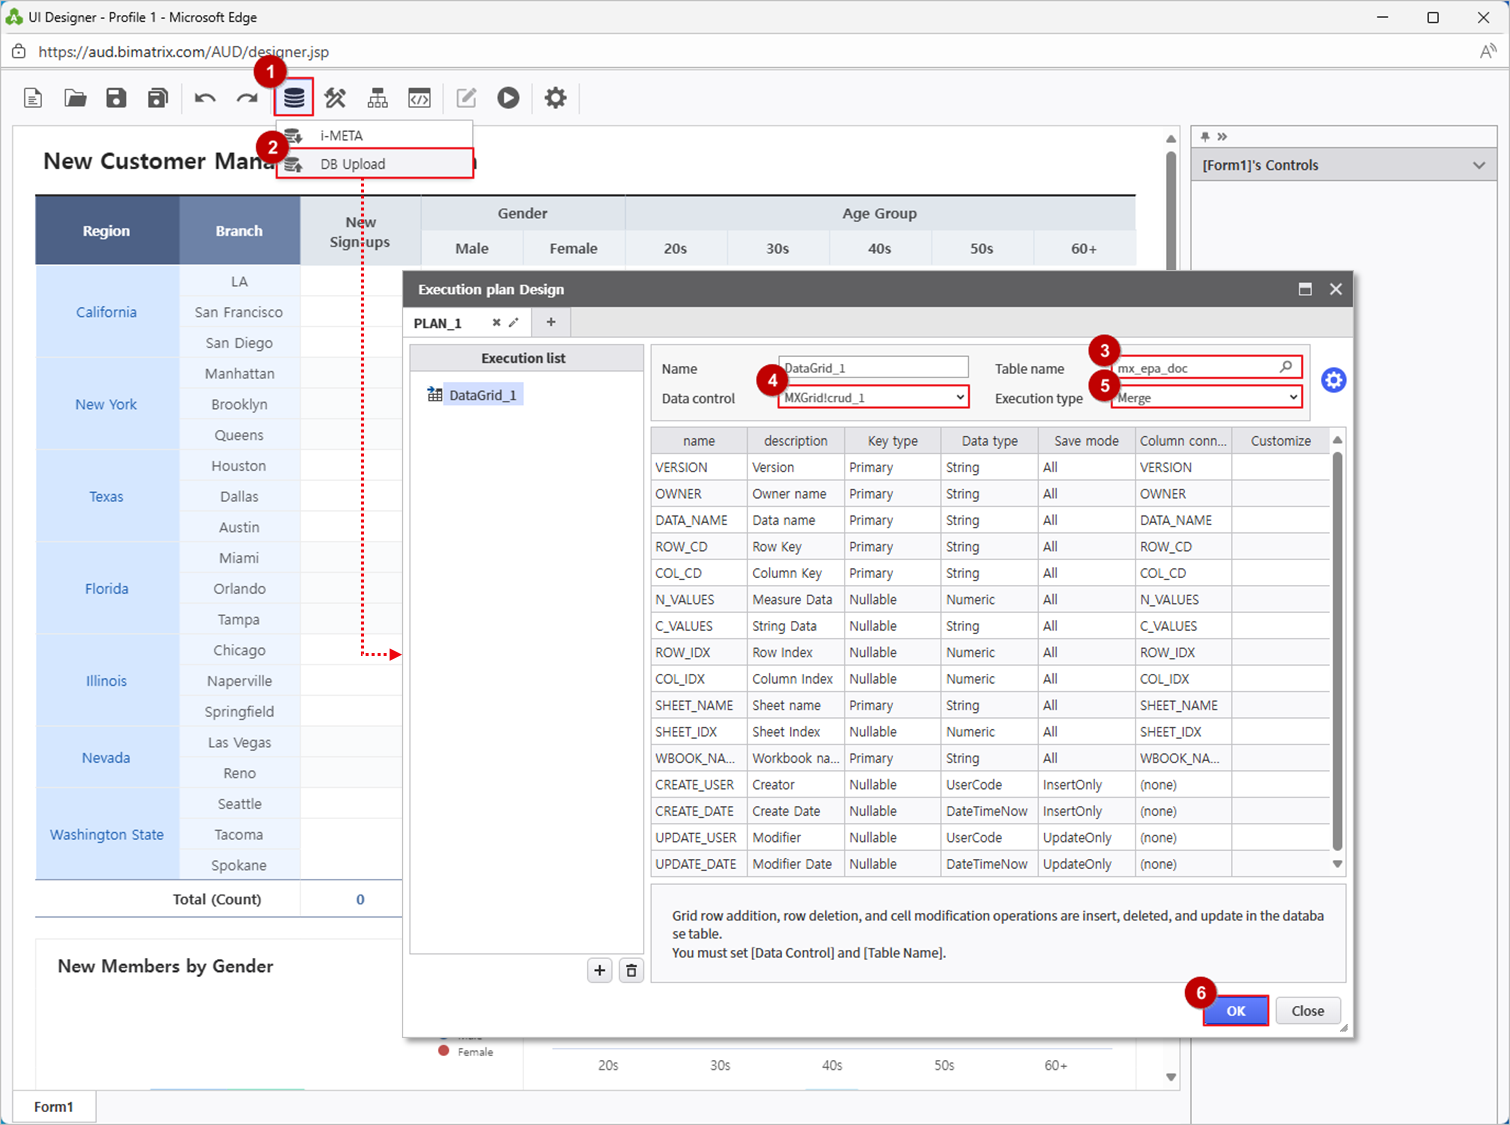
Open DB Bot > DB Upload to configure database connectivity.
Add two buttons from UI Bot > Button: name them BTN_SAVE and BTN_REFRESH, and place them in the appropriate positions.
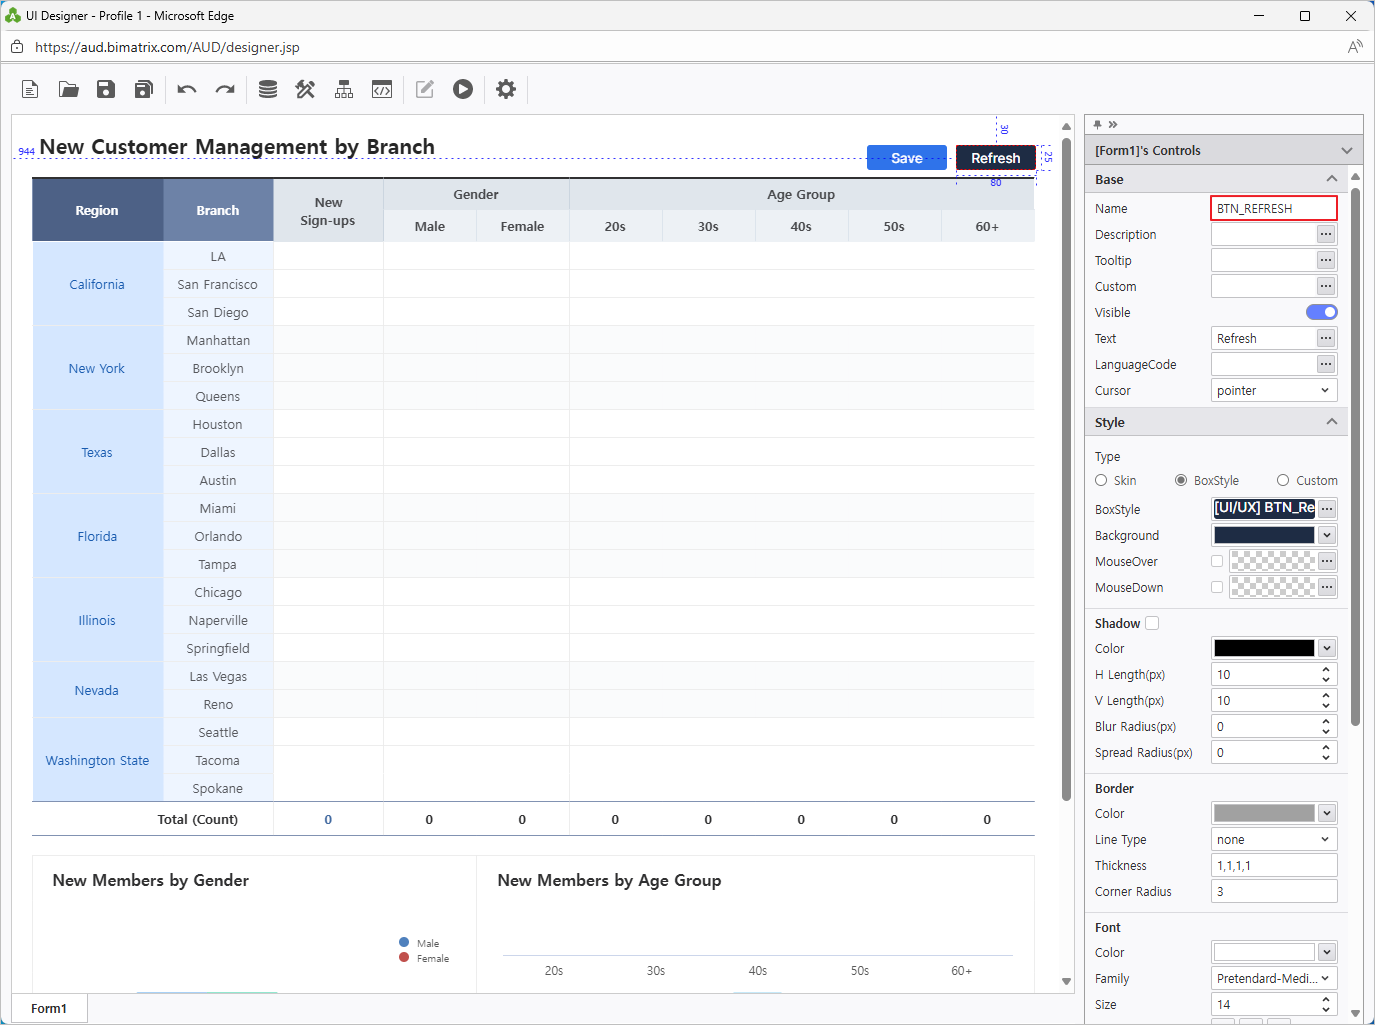
Use Process Bot to assign actions to the buttons (Save and Refresh).
Tip: The Merge execution ensures that branch data from multiple users is consolidated without overwriting each other's entries.
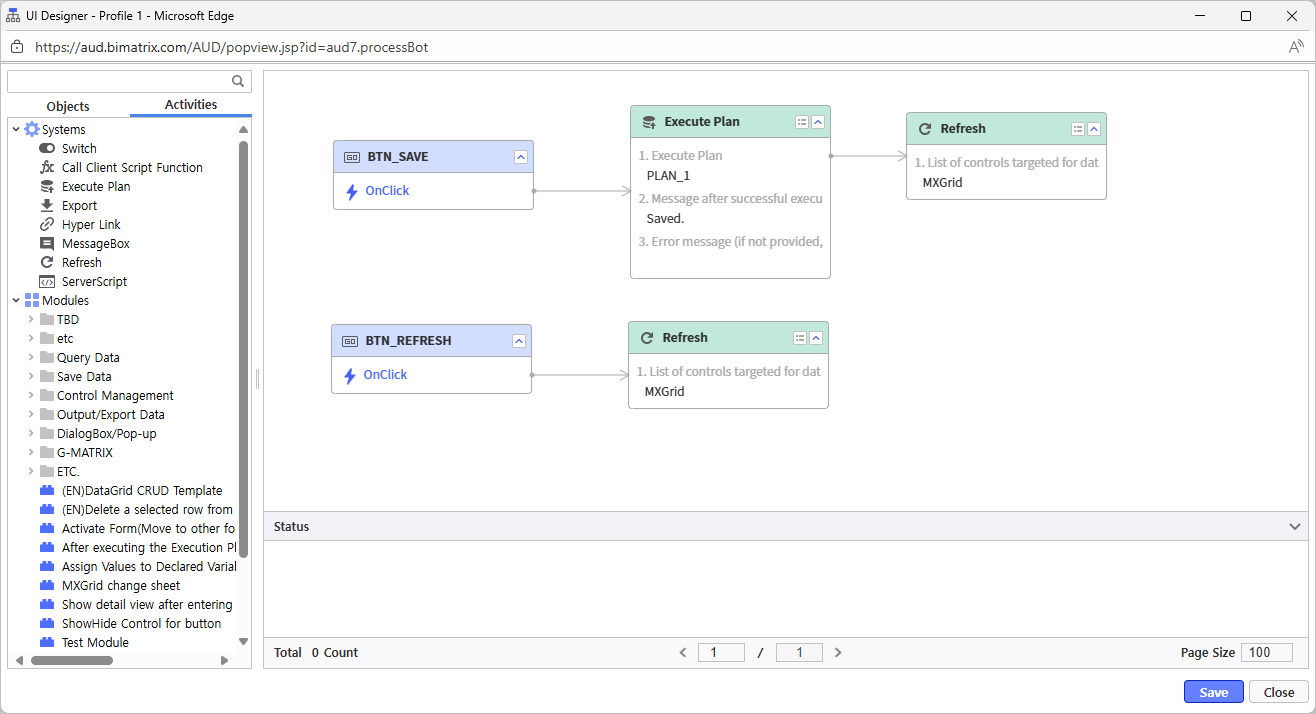
Verify that the Save button stores data in the database and the Refresh button fetches the stored data correctly.

Save Report
Save and verify your completed branch management report
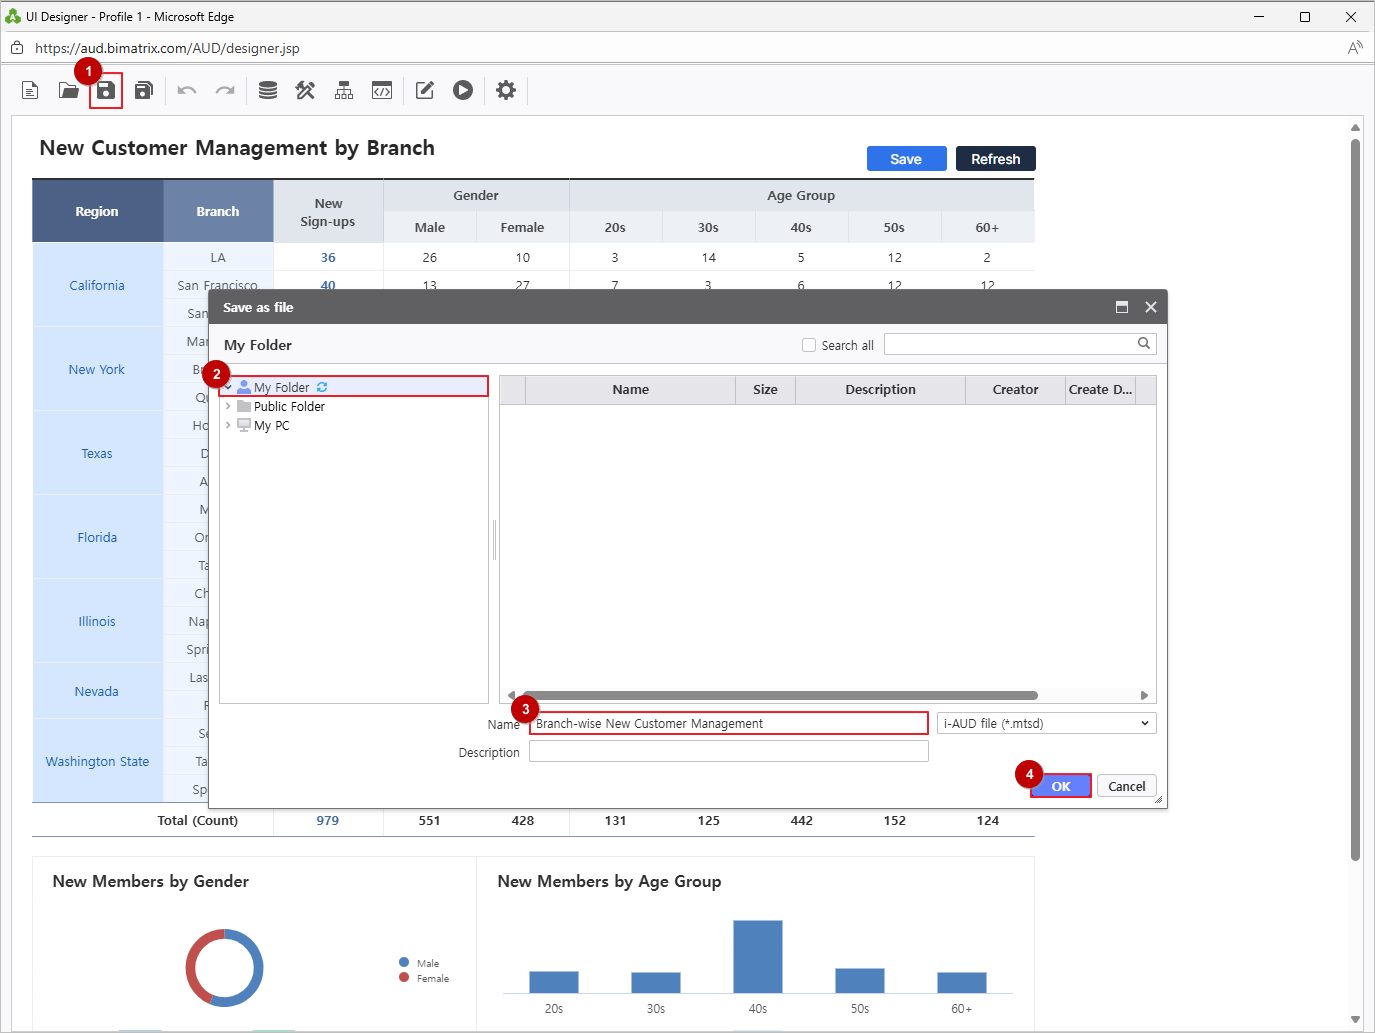
Save your report to My Folder.
Verify the saved report by navigating to the Individual reports section. Test the Save and Refresh buttons to confirm data operations work correctly.