Convert Excel to Web
Download sample file and create the web report foundation
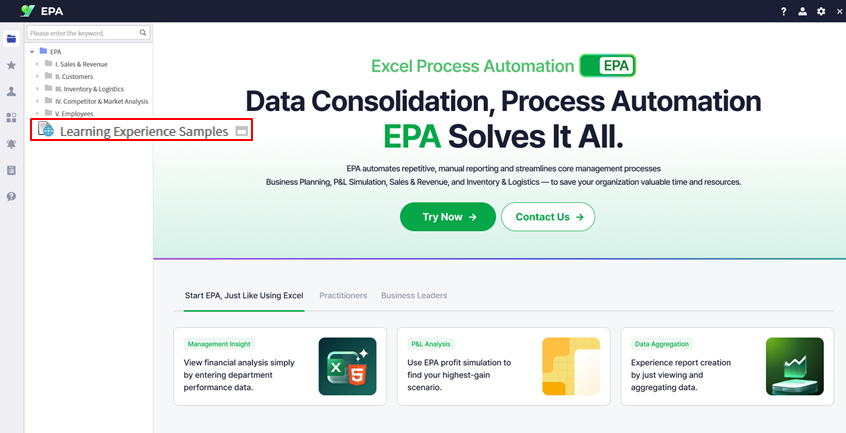
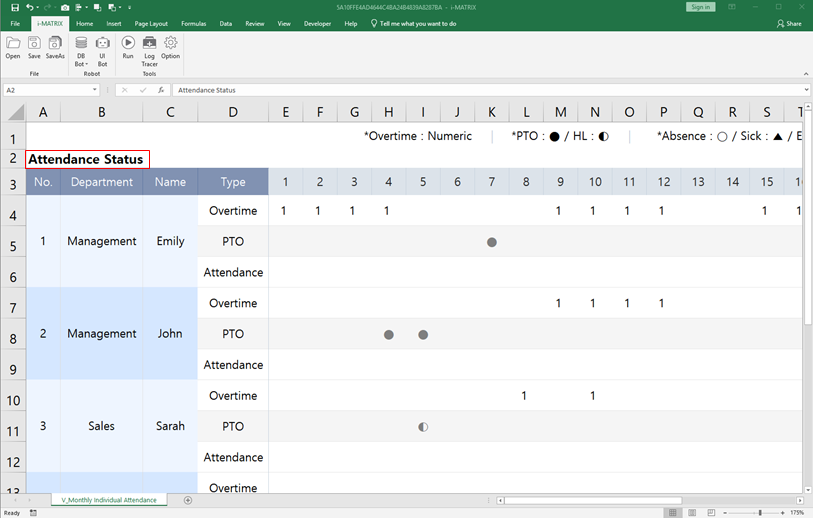
Download the sample Excel file for monthly attendance management from Learning Experience Samples.
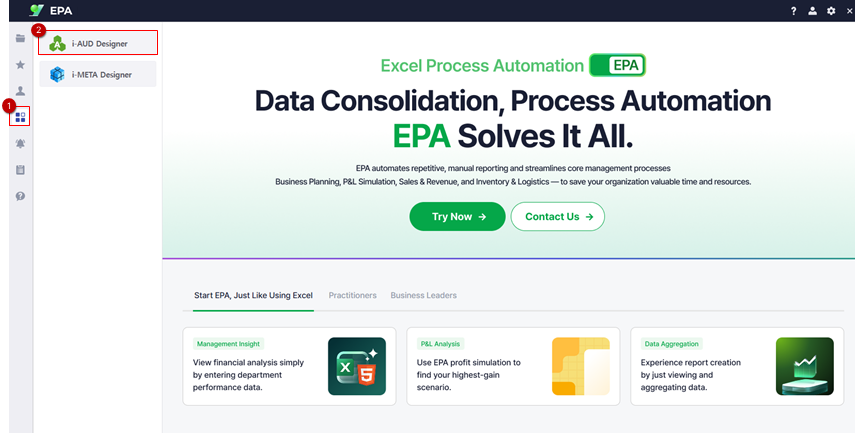
Launch i-AUD Designer from [Menu] → [Tool].
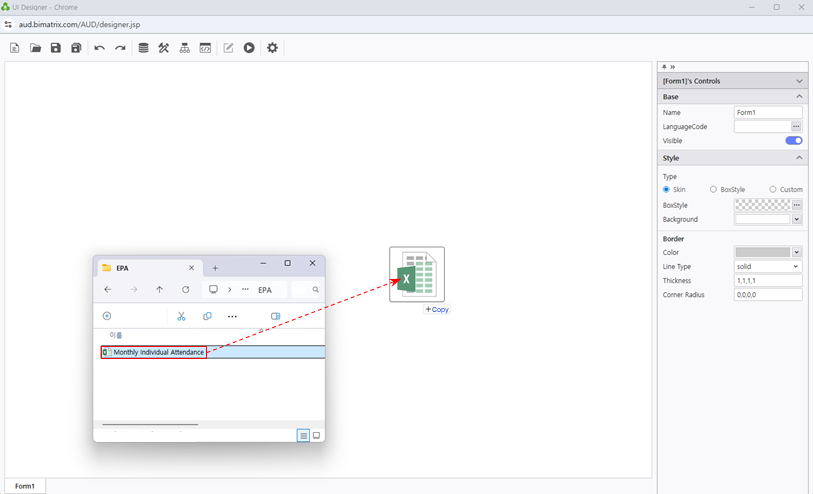
Drag & drop the Excel file into the Designer workspace.
Set Line Type: None for clean presentation.
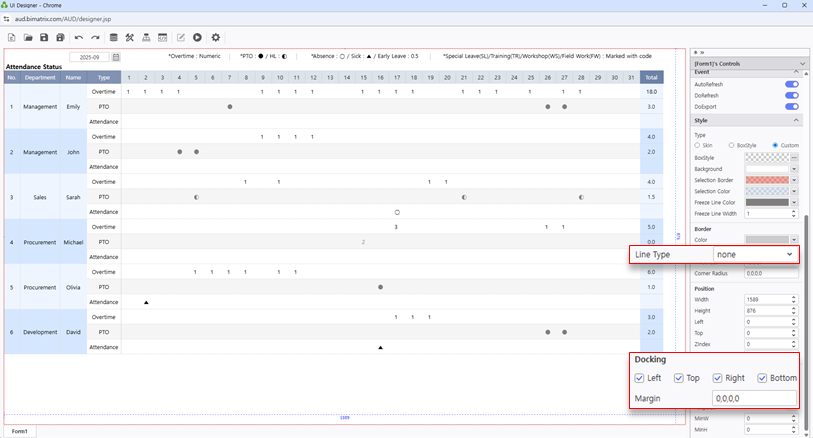
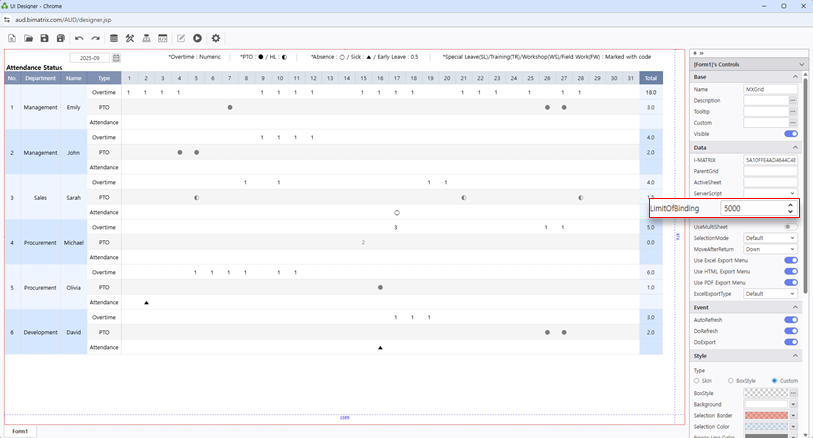
Configure Docking to Left / Top / Right / Bottom and set LimitofBinding: 5000 to handle large attendance datasets.
Tip: Attendance sheets can have many columns (one per day). Setting LimitofBinding to 5000 and full docking ensures all date columns display correctly.
Configure Data Input
Define data areas, date variables, and dynamic column visibility
Review the table naming convention for the data input screen.
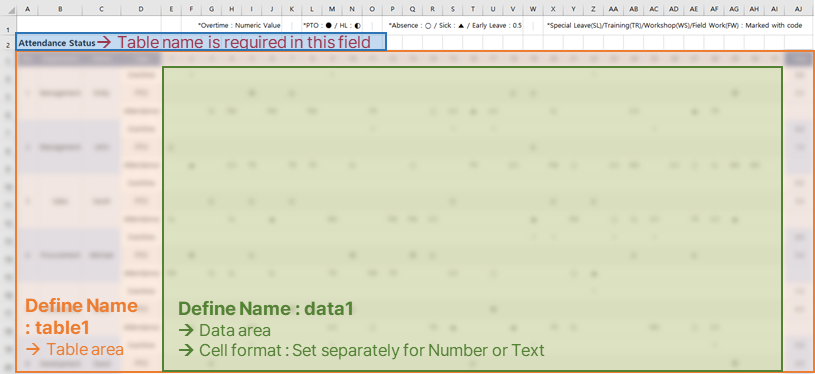
Name the data area as data1.
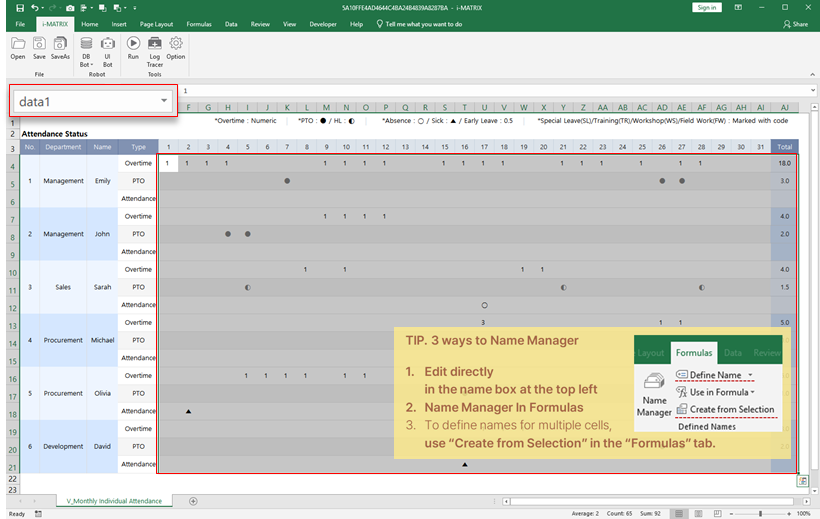
Select the entire table form and name it as table1.
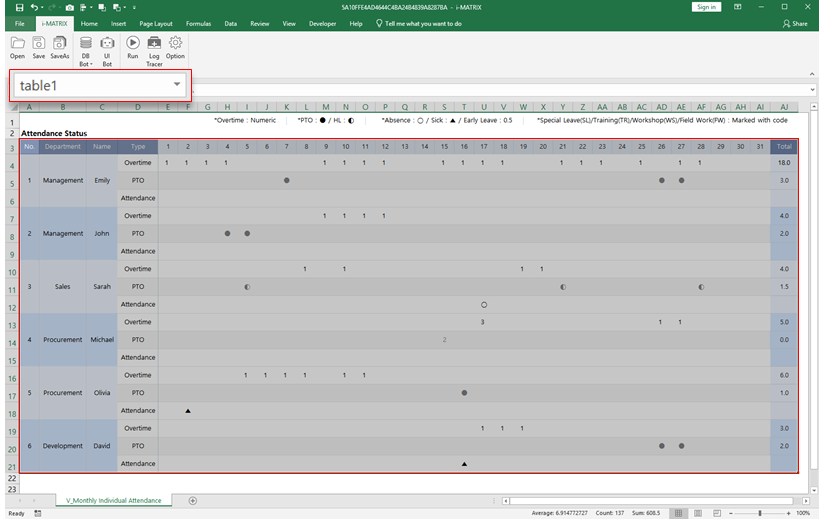
Enter the table name in the top-left corner cell of the table1 area.
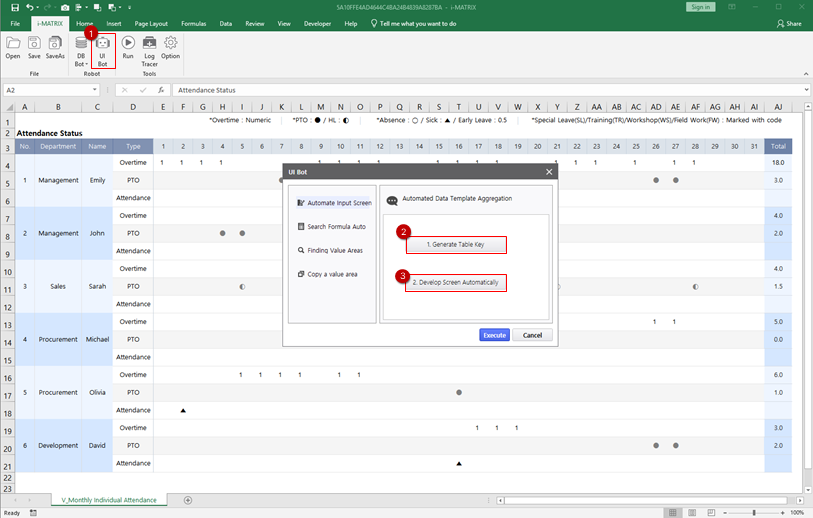
Launch UI Bot from the i-MATRIX ribbon to configure the input interface.
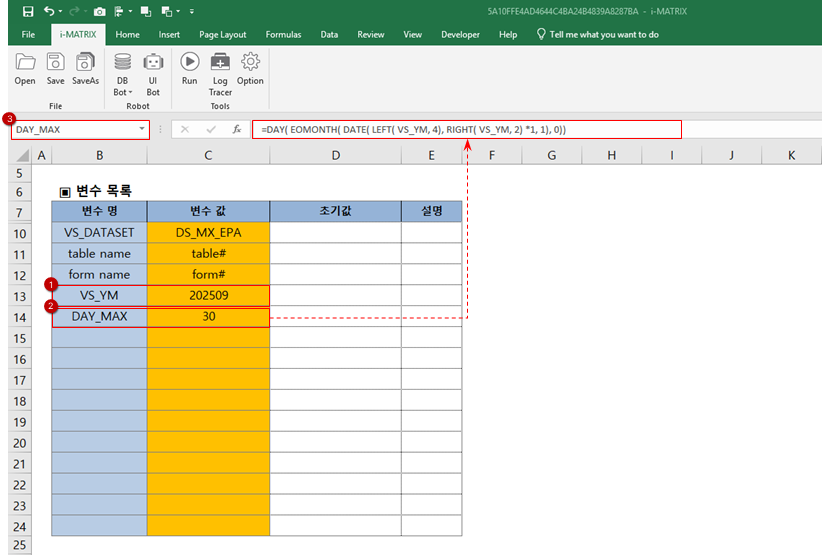
Define the VS_YM variable in the P1 sheet and create the DAY_MAX formula to calculate the number of days in the selected month.
Review the V1 sheet formulas for date-based changes and title updates.
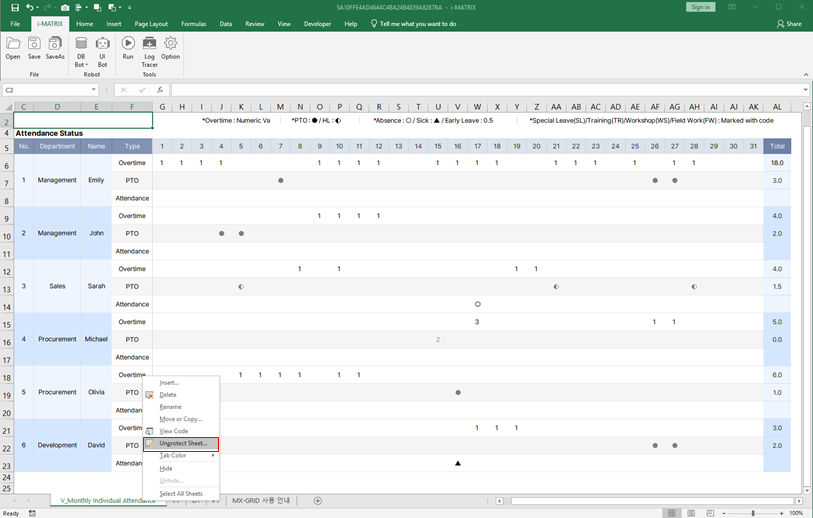
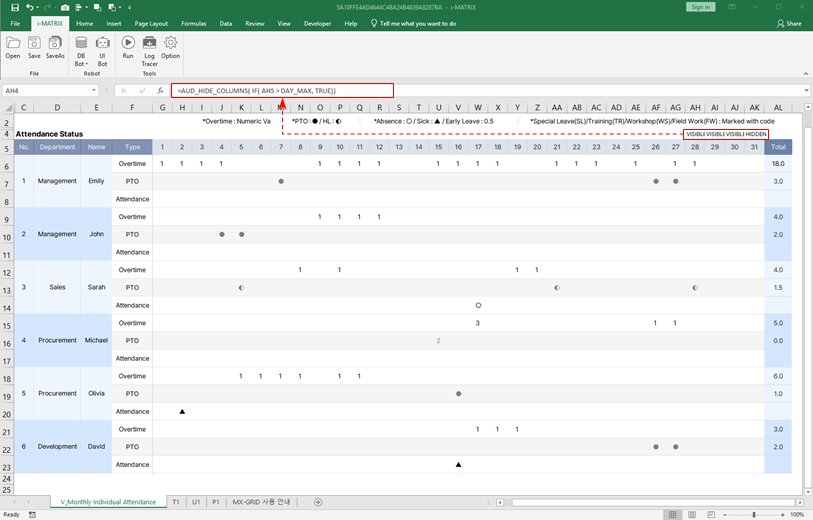
Configure AUD_HIDE_COLUMNS to hide unused date columns (e.g., days 29–31 for shorter months).
Tip: The AUD_HIDE_COLUMNS feature automatically hides columns for days that do not exist in the selected month (e.g., Feb 30, Feb 31), keeping the report clean and accurate.
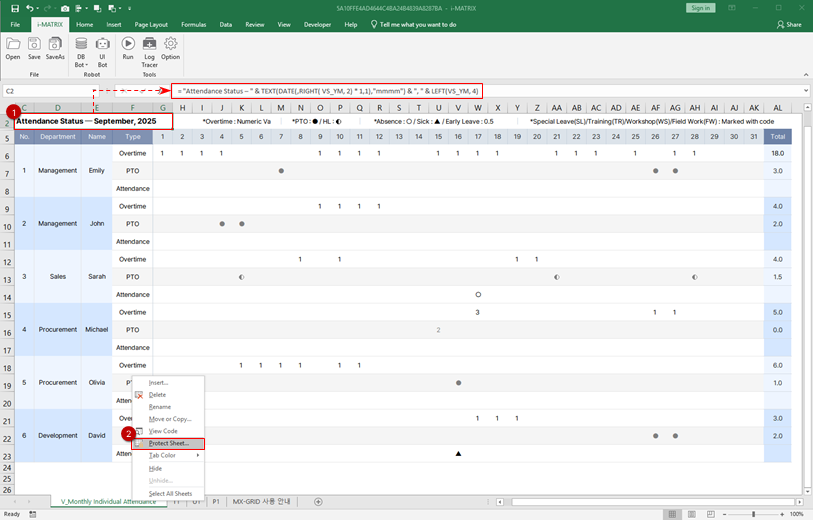
Set up a dynamic title formula that updates based on the selected year and month.
Connect Database & Buttons
Set up database upload, month calendar, and action buttons
Open DB Bot → DB Upload to configure database connectivity.
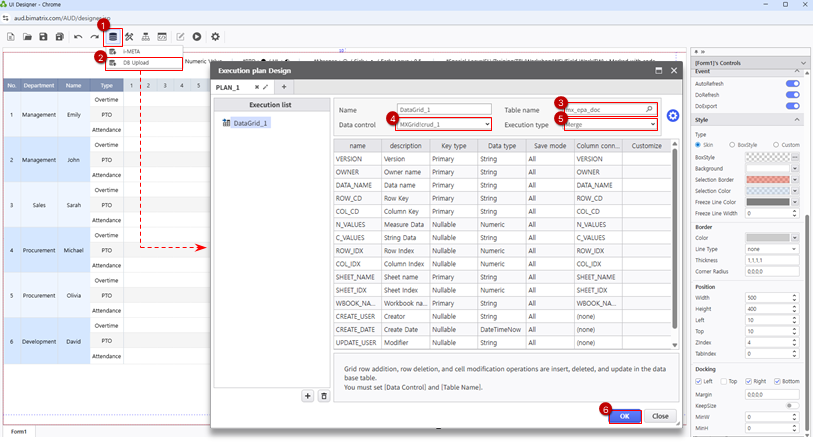
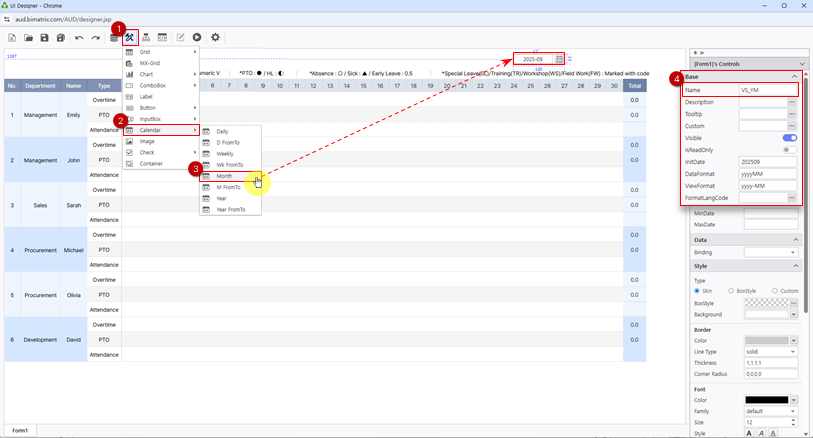
Add a Month Calendar component bound to VS_YM and configure Merge execution for data synchronization.
Tip: Setting InitDate to 202509 means the calendar will default to September 2025 when the report loads. Adjust this to your desired default month.
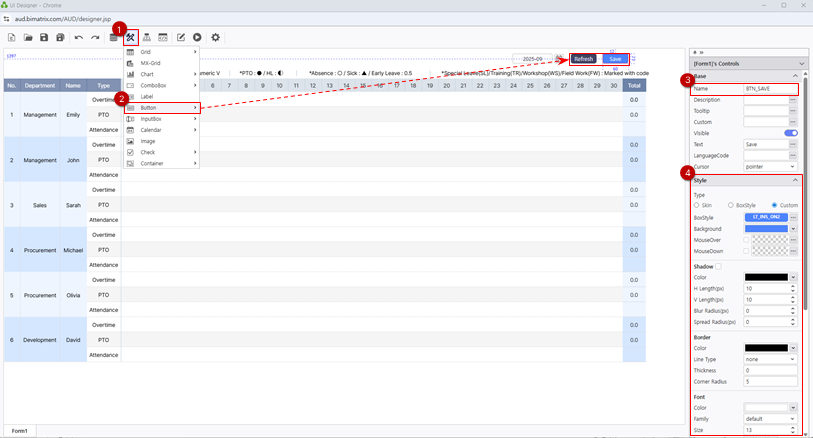
Name the BTN_SAVE and BTN_REFRESH buttons.
Assign button actions via Process Bot to connect Save and Refresh to their respective operations.
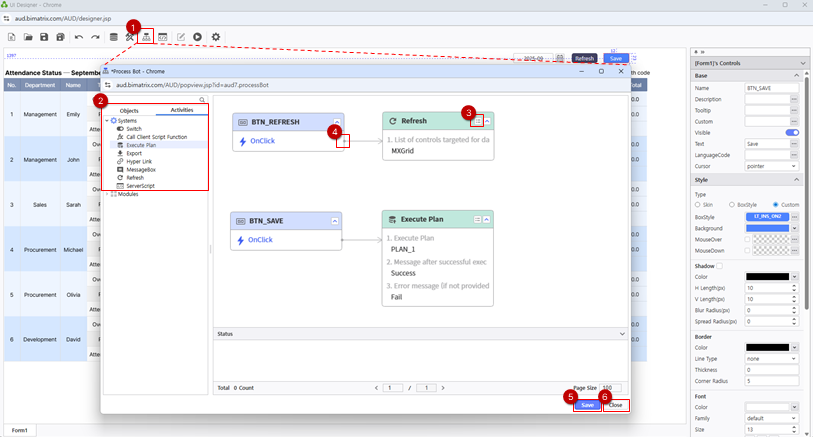
Verify Save and Refresh functionality to confirm data entry and operations work correctly.
Save Report
Save and verify your completed attendance management report
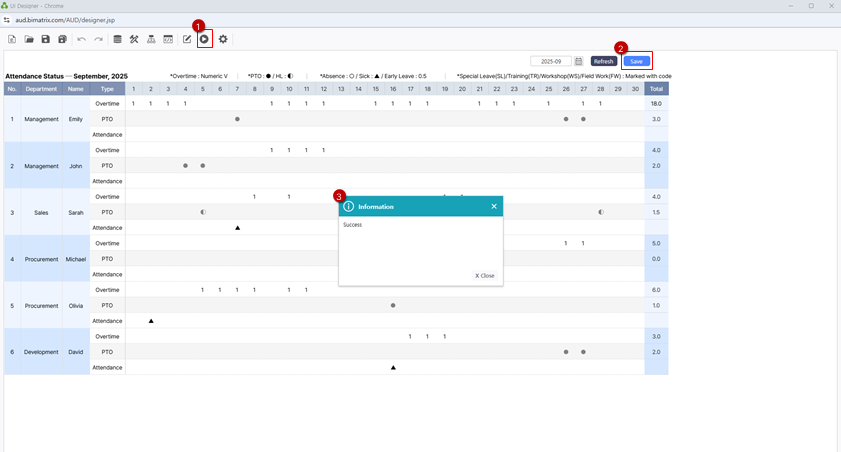
Save your report to My Folder.
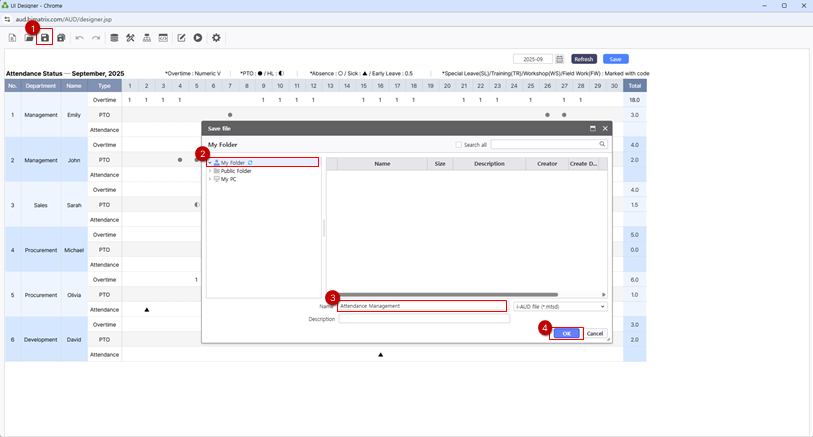
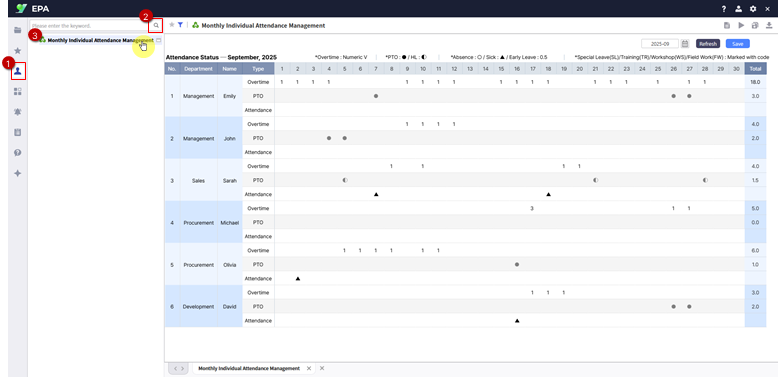
Verify the saved report by navigating to the Individual reports section. Test the Month Calendar, Save, and Refresh buttons. Switch between months to verify that column visibility adjusts dynamically.